You know that feeling: it’s the night before a ride, you’re staring at a route on your phone, and suddenly you’re not sure if 30 miles is too ambitious, whether your battery will hold through the hills, or if you’ve packed everything you actually need. It’s a familiar spot for a lot of e-bike riders, and it happens because e-bike day trip planning has more moving parts than it first appears.
The good news is that every one of those decisions, from route selection to charging strategy to what goes in your bag, follows a clear, repeatable process. Services like Fun E-Bike Adventures exist precisely to take the guesswork out of days like this one, offering personally scouted, GPS-ready routes that handle the hardest planning decisions for you. But whether you build your own route or start with a verified one, these 10 tips will walk you through every step so you can stop second-guessing and start riding.
E-Bike Day Trip Planning: Picking a Route That Actually Fits Your Ride
The most common mistake new day-trippers make is choosing a route based purely on distance. They see “25 miles” and think that sounds manageable, without accounting for elevation, surface type, or how their specific e-bike handles each of those variables. The right starting point is understanding what your bike does well.
Tip 1: Match route difficulty to your motor type and terrain
Mid-drive motors use the bike’s gears to deliver power efficiently, which makes them noticeably better on climbs and hilly terrain. Hub-drive motors are simpler and more than capable, but they shine on flatter routes where the motor isn’t constantly working against gravity. When you’re shortlisting routes, always check the elevation gain alongside the mileage. A 25-mile coastal cruise and a 25-mile route with 1,500 feet of climbing are completely different days out.
Tip 2: Use a pre-scouted GPS route instead of guessing from scratch
Standard map apps show roads, but they don’t tell you where the pavement turns rough, which paths are genuinely bike-friendly, or where to pull over for a view worth stopping for. Pre-scouted routes, like those available through Fun E-Bike Adventures, are personally ridden and verified by someone who already knows the trail conditions, the hidden rest spots, and the safe crossings. For e-bike day trip planning purposes, starting with a verified guided e-bike tour route beats spending two hours piecing one together yourself and still wondering if you missed something.
Tip 3: Set a realistic mileage ceiling for your first few trips
For a half-day trip, 10 to 20 miles is comfortable for most riders. A full-day outing with moderate assist typically works well in the 20 to 30 mile range. E-bike riding is still physical activity, and fatigue is real even with motor support, so build in breathing room rather than pushing your ceiling on your first few outings.
2. Understanding Your Battery Range Before You Leave Home
Battery range is the most misunderstood part of planning an electric bike day trip. Manufacturer claims are tested under ideal lab conditions, not on mixed terrain with a loaded bike and a real rider. Knowing your actual working range before you leave the driveway changes everything about your approach to e-bike day trip planning.
Tip 4: Know your real-world range by motor class and battery size
On mixed terrain with moderate assist, hub-drive bikes realistically cover 25 to 45 miles on a 500Wh battery. Mid-drive bikes often reach 30 to 55 miles on the same charge because they use the drivetrain more efficiently on climbs. Commuter-style e-bikes, with their efficient geometry and narrower tires, frequently push 40 to 60 miles under similar conditions. These are working estimates, not spec-sheet numbers, and knowing your battery capacity in watt-hours gives you a reliable anchor for your pedal-assist route planning.
Tip 5: Factor in hills, assist level, rider weight, and cargo
High assist on steep climbs can push consumption to 25 to 40 Wh per mile, compared to 10 to 15 Wh per mile on flat ground with low assist. A heavier rider or loaded cargo adds roughly 15 to 20 percent more draw above a 150-pound reference weight. On hilly routes specifically, expect your overall range to drop 30 to 50 percent compared to flat terrain. Always add a 20 percent buffer to your range estimate so you’re never left coasting on empty two miles from the trailhead.
3. Locating and Timing Your Charging Stops
Most well-planned day trips won’t require a mid-ride top-up if your battery math checks out. But knowing where you can charge gives you a real fallback, and having two or three options mapped before you leave is far better than searching on the fly when your battery is already low.
Tip 6: Map your charging options before you ride, not during
Apps like eBikemap and Cycling Planner display charger locations along a planned route and are worth checking the evening before a big ride. For a practical backup strategy, supermarkets, visitor centers, and town centers in the U.S. are reliable places to find accessible outlets or public chargers during business hours. Pinning two or three potential stops on your route gives you flexibility without pressure. The U.S. DOE’s Alternative Fuels Station Locator is also worth bookmarking for route-based charger discovery.
Tip 7: Follow charging etiquette at cafes and public spots
At a cafe or shop, always ask before plugging in. Buy something, keep the stop reasonable, and move on once the battery has a useful charge rather than sitting for a full top-up. At public chargers, confirm the connector type and payment method before you arrive so you’re not stuck at a station you can’t use. Good trail etiquette keeps these spots available for the next rider and keeps businesses willing to host cyclists in the first place.
4. Packing Smart Without Weighing Yourself Down
Every extra pound affects range and handling. Packing for an e-bike day trip is about having everything you genuinely need without overloading the bike. Aim for a day bag in the 5 to 8 pound range, light enough to ignore on flat stretches, complete enough to handle the unexpected.
Tip 8: Carry the right tools and spares for a self-supported ride
A solid core kit covers most situations you’ll encounter on a day trip:
- A multi-tool with hex keys and screwdriver bits
- Tire levers, a mini pump or CO2 inflator, and a spare tube matched to your tire size
- A patch kit, a quick link, and a chain tool for longer or more remote routes
- Zip ties and a small strip of duct tape for emergency fixes
The charger only needs to come along if the route approaches your real-world battery limit. On shorter trips, it’s dead weight.
Tip 9: Match your packing setup to your bike type
Commuter and utility e-bikes work best with panniers or a rear rack bag for heavier items like a lock, charger, and extra layers. Hardtail trail e-bikes pair well with a frame bag and a small hip pack. Full-suspension bikes have limited mounting real estate, so a compact frame bag plus a light backpack is the smarter combo. Gravel and road e-bikes favor a saddle bag and top-tube bag to keep weight low and handling clean. In every case, keep heavy items close to the bike’s center of mass so the handling stays predictable.
5. Choosing the Right Navigation Tools for the Trail
A great route file is only useful if the navigation app can deliver it reliably when you’re out there. The format of your route file and the app you run it through matter just as much as the route itself.
Tip 10: Pick a navigation app built for cycling, not general driving
For U.S. riders doing day trips, the most practical all-round choices are Ride with GPS and Komoot. Ride with GPS delivers accurate turn-by-turn navigation with strong offline support and is widely used among recreational and touring cyclists. Komoot handles route shaping and elevation-aware planning well and connects to a range of compatible head units. eBikemap goes the deepest on battery-aware routing and charger discovery if those features matter on a specific trip. Google Maps works in a pinch, but it has no e-bike-specific logic and occasionally routes cyclists onto roads that are genuinely unpleasant on a bike.
Why a downloadable GPS route beats planning from scratch
Routes built on the Ride with GPS platform, like those available through Fun E-Bike Adventures, arrive already formatted for turn-by-turn navigation with mileage, duration, and e-bike-friendly trail selection built in. Once downloaded, they work offline too, which matters on scenic routes where cell coverage gets patchy. At under $3 per route with lifetime access, it’s one of the most affordable ways to ride with insider local knowledge baked directly into your navigation.
6. Timing Your Day for a Smoother, Safer Ride
Even a solid route loses its appeal when the timing works against you. When you start, how you manage assist throughout the day, and how much buffer time you build in are all underrated parts of smart e-bike day trip planning.
Start early and use the first hour as your buffer
A 7 to 9 AM start works well for most day trips. Starting early avoids peak heat, which typically builds from late morning through mid-afternoon, and it gives you more daylight buffer for spontaneous detours. Trailhead parking is also significantly easier to find before 9 AM on weekends. The first hour of a ride is the best time to catch any mechanical issues before you’re committed to a long stretch away from the car.
Manage your assist levels to protect range for the second half
Start on a lower assist setting and save higher modes for climbs and headwinds. Many riders burn through 40 percent of their battery in the first third of a ride by running high assist on flat ground out of habit. A simple rule worth keeping: use the lowest assist that still feels comfortable, and bump up only when the terrain actually demands it. This keeps the battery healthy for the return leg, when fatigue is higher and you’re less likely to want to stop and rest.
Ready to Ride: Putting It All Together
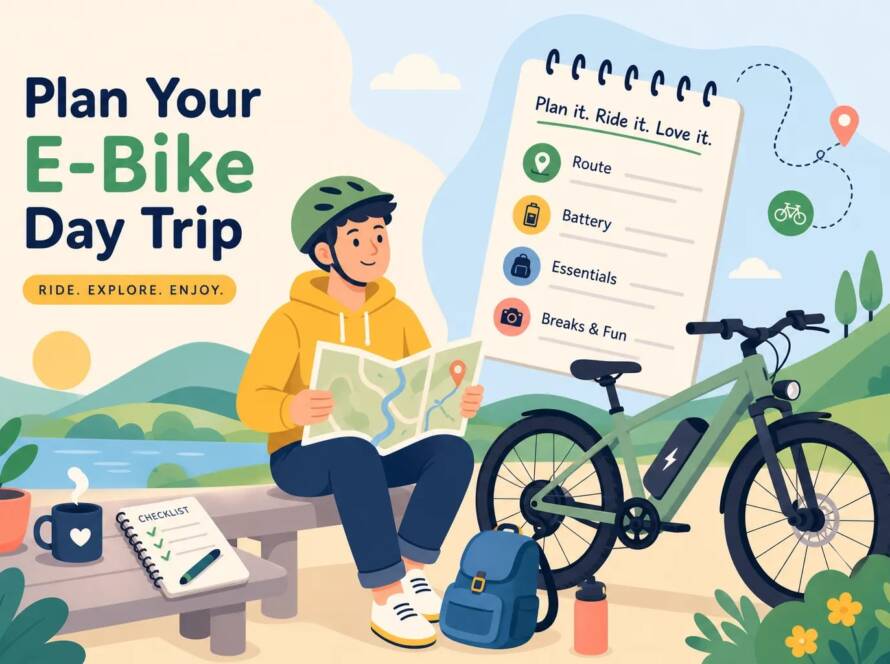
Solid e-bike day trip planning comes down to eliminating surprises. When you know your real-world battery range, have the right tools in the bag, understand where you can charge if needed, and have a reliable route to follow, the day stops being something to manage and becomes something to actually enjoy. Pick your route, run through this checklist the night before, and roll out with confidence.
For riders who’d rather skip the planning legwork entirely, downloadable GPS routes from Fun E-Bike Adventures offer a fully pre-scouted, turn-by-turn experience for the price of a cup of coffee. Every route is personally ridden and verified by the founder, so the insider knowledge is already built in. Reach out to our team or browse the available routes to find your next adventure.