How do I plan an e-bike day trip? Picture this: you just got your first e-bike, you’re sitting at the kitchen table with Google Maps open, and you have absolutely no idea where to start. The route options feel endless. Battery range questions are swirling in your head. And you’re not even sure what to throw in a bag for the day. Planning an electric bike day trip sounds complicated until you realize it’s really just five decisions stacked in order.
The good news is that most of the hard work has already been done for you. Fun E-Bike Adventures offers GPS-guided routes built specifically for beginners, so you don’t have to figure everything out from scratch. Each route comes with mileage, estimated duration, and insider stops already built in. But even before you browse routes, it helps to understand the five planning steps that make any pedal-assist day outing go smoothly: picking the right route, estimating your realistic range, finding a charging option if you need one, packing smart, and spacing your stops so the day actually stays fun.
How Do I Plan an E-Bike Day Trip: Choosing the Right Route
The single hardest planning decision for most beginners isn’t battery range or packing. It’s figuring out where to ride. Not all routes are created equal, and a bad route choice can turn an exciting first outing into a stressful slog.
What makes a beginner-friendly e-bike route
A genuinely beginner-friendly route has a few defining traits: a paved or smooth packed surface, low-to-moderate elevation gain, accessible rest stops along the way, and points of interest that give the ride some structure and motivation. Off-street paths and multi-use trails are especially good for new riders because they remove the stress of traffic, make it easier to stop and look around, and keep the experience enjoyable from start to finish.
Why generic map apps fall short for e-bike route planning
Standard navigation tools like Google Maps weren’t built for cyclists planning a pedal-assist day outing. They don’t distinguish between a scenic waterfront bike path and a busy highway shoulder. They won’t tell you which intersection gets confusing, where to grab coffee mid-ride, or whether that shortcut runs uphill for two miles. Surface type, battery-appropriate terrain, and scenic value are all invisible to a generic app, which means you end up doing all the research yourself.
How a pre-scouted GPS route does the hardest planning for you
A purpose-built cycling route solves all of that in one download. Fun E-Bike Adventures routes are pre-scouted and verified before they go on sale, so every turn, point of interest, and tricky intersection is already accounted for. You get insider-level local knowledge, safety-vetted paths, mileage, and a suggested duration, no scouting, no guesswork, and no piecing together directions from multiple apps.
How Do I Plan an E-Bike Day Trip: Estimating Battery Range
Before you commit to a destination, you need an honest sense of what your battery can actually do. This is where most new riders either overplan and feel constrained, or underplan and end up nervous about range halfway through the ride. The reality is simpler than most people expect.
How to read your battery range at different assist levels
On flat paved terrain, most consumer e-bikes deliver roughly 60 to 120 miles on low assist, 30 to 60 miles on medium assist, and 15 to 30 miles on high assist. A 500 Wh battery, which is common on mid-range bikes, typically lands around 25 to 70 miles under real mixed-use conditions. For your first electric bike day trip, treat these as planning anchors and stay conservative: aim to leave at least 20 to 30 percent of your range in reserve so you have a comfortable buffer for detours, headwinds, or a longer lunch stop.
How hills change your battery math
Elevation gain hits your battery harder than most beginners expect. Hilly terrain can cut your range by 40 to 60% compared to a flat route, and a reasonable planning estimate is roughly 40 Wh burned per 1,000 feet of climbing. If your route has 2,000 feet of elevation gain, that’s about 80 Wh just for the climbs, a meaningful chunk of a 400 Wh or 500 Wh pack. For your first few rides, choose a route with minimal elevation change. It makes the experience more comfortable and the battery math a lot more predictable.
A simple way to estimate your ride time
Use 15 mph as your planning average on paved bike paths and 12 to 15 mph on mixed surfaces. Walk through a quick example: a 25-mile route at 15 mph gives you roughly 1 hour and 40 minutes of actual riding time. Add an hour for stops, a lunch break, and the moments where you pull over to enjoy the scenery, and you’re looking at a solid 3-hour outing. That’s a completely manageable first self-guided e-bike tour, and knowing that number in advance makes the planning feel much less daunting.
Finding charging stops so you never end up stranded
Battery anxiety is one of the most common things holding new riders back from committing to a longer e-bike day ride. The truth is more reassuring than most riders expect: most day rides don’t require a full recharge mid-route. They just need a smart top-up strategy built into a natural break you were going to take anyway.
Where to plug in during a day ride
Public charging options are more common than most riders realize. Cafés and restaurants along popular trail corridors will often let you plug in while you eat. Bike shops, libraries, transit hubs, and trail-town municipal facilities frequently have accessible outdoor outlets or dedicated charging points. In established trail communities like those along the Great Allegheny Passage, free public e-bike charging stations are available right in town. You rarely need a formal fast-charging station; a standard outlet and 45 to 60 minutes of rest goes a long way toward topping up your battery.
How much range a rest stop actually gives you back
A 45-minute lunch stop on a standard charger can realistically add around 9 to 12 miles of meaningful range, or more, depending on your battery size and charger output. That’s usually enough to extend your ride comfortably or take a more relaxed route home. A full charge from empty takes 3 to 6 hours, so a complete recharge isn’t the goal on a day trip. Partial top-ups at meal breaks are almost always all you need, and they fit naturally into a well-paced day on the trail.
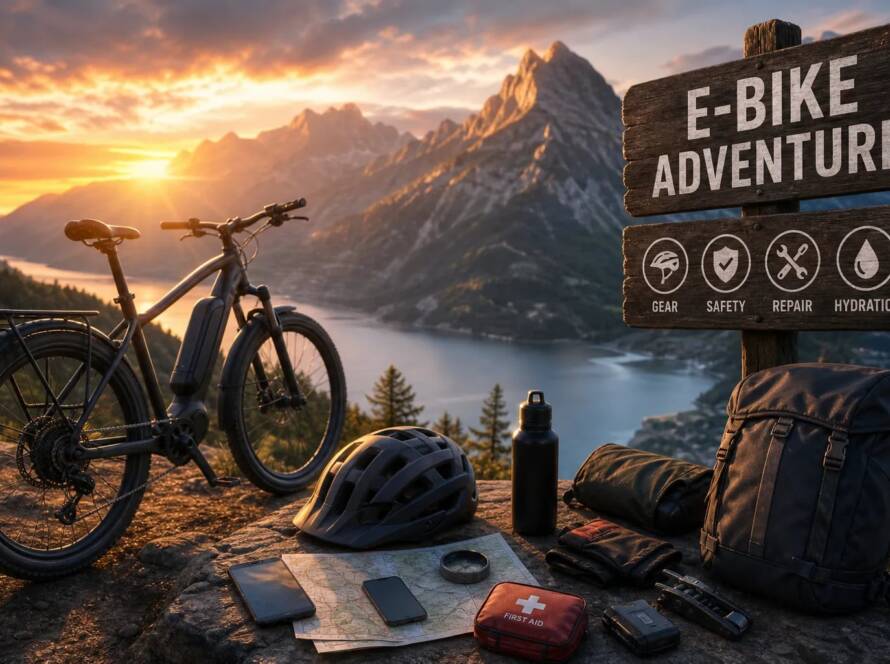
What to pack for a comfortable e-bike day outing
Packing for a day ride is simpler than most beginners expect, but getting it wrong makes the day miserable. The goal is a lean kit that handles the most likely situations without weighing you down or requiring a dedicated cargo bike to haul.
The repair kit you’ll actually use
A compact saddle bag can hold everything you genuinely need for trailside repairs. Pack a multi-tool with Allen keys, tire levers, a patch kit, a spare tube, and a mini pump or CO2 inflator. Toss in a chain quick-link and a few zip ties for good measure. These items cover the vast majority of issues you’re realistically going to encounter on a paved or well-surfaced e-bike route, flats, a loose brake bolt, a dropped chain, and most other common trail problems.
Clothing, food, and the smart extras
For clothing, a wicking jersey, padded shorts, cycling gloves, and a packable wind layer cover most weather windows you’ll encounter on a half-day or full-day outing. Bring more water than you think you need, and pack snacks that won’t melt into a mess by mile 10.
The extras that are always worth carrying: a small first-aid kit with bandages and pain relievers, your phone with the route downloaded for offline use, cash, and your ID. None of this adds much weight, and all of it has saved many a ride from turning sideways.
Planning rest stops and simple backup plans
Rest stops aren’t just logistics. They’re what transforms a point-A-to-point-B ride into an actual adventure. How you space them, and what you do with them, shapes the entire feel of the day.
How to space stops for a comfortable pace
For a first electric bike day trip, many riders find stopping roughly every 8 to 12 miles keeps the pace comfortable, though the right interval depends on your fitness level and the terrain. Use natural landmarks as your anchors: a waterfront park, a local café, a viewpoint, a historic marker. These become the moments you remember from the ride, not just fuel stops. Pre-scouted GPS routes, like those offered through Fun E-Bike Adventures, often include points of interest already mapped along the route, which keeps the day feeling like an exploration rather than a navigation exercise.
Your e-bike packing checklist for the day ahead
Before you leave, run through a quick mental checklist: repair kit packed, phone charged with the route saved offline, water and snacks loaded, wind layer stashed, and battery topped to full. A two-minute check at the door prevents most mid-ride surprises.
Simple contingency thinking for when things go sideways
You don’t need a full emergency plan for a day ride. You just need honest answers to three questions before you leave: Where is the nearest bike shop along the route? What’s my bail-out point if I need to turn around early? Do I have enough battery reserve to reroute if I take a wrong turn? Think through those things once, write them down if it helps, and then stop worrying about it. Many rides go exactly as planned, and when something does come up, a little advance thought usually makes it easy to manage.
You’re more ready than you think
So, how do I plan an e-bike day trip? It comes down to five straightforward steps: pick a route that’s genuinely suited to your experience level, estimate your range honestly and conservatively, identify a charging option if you need one, pack a lean and practical kit, and space your stops so the day stays fun from start to finish. None of these require advanced skills or specialized gear. They just require a little thought before you leave the house.
The hardest step, finding a great route, gets a lot easier when you start with a pre-scouted GPS route from Fun E-Bike Adventures. Each route includes built-in mileage, suggested stops, and the kind of local detail you’d otherwise spend hours researching on your own. Browse the available routes and find one that matches your distance comfort zone and local area.
Your first pedal-assist day outing doesn’t have to be perfect. It just has to get you out the door. Pick a route, charge your battery, throw your kit in a bag, and go. The rest takes care of itself on the trail.